This blog is the conclusion to the blog: Identifying Custom Test Cases in the SEMI E30 GEM Standard found here.
Unhappy Path Testing
Though this post will focus on the so-called “happy path” (i.e., no errors), it is also important to test unhappy paths.
Conditions that might show up in the “unhappy path” testing include:
- Card reader loses internet connection.
- Card reader loses power
- Vending machine loses communication with Card reader
Happy Path Test Case
The happy path is the program flow that is followed given the user (or in this case, the equipment) only enters valid data. I
n this simple test, we ignore the Error/Alarm cases (Transitions T2 and T4).
Transition Test Steps for Happy Path
- Initializing T1 =>
- Wait_Payment T3 =>
- Wait_Selection T5 =>
- Dispense_Item T7=>
- while (User wants more items && has sufficient funds)
{
Dispense_Item T6
Wait_Selection T5
} - Transaction Complete T8
EquipmentTest plugin setup
Prerequisites:
- EquipmentTest 1.0.3 or later installed.
- Visual Studio 2019 or later (Targeting .NET Framework)
- .NET 4.8 SDK
- A unit of GEM-enabled equipment (or equivalent) to test against
- Follow the instructions in the EquipmentTest Developer Guide Section titled: “Creating a plug-in using Visual Studio”,
Test Flow
Sometimes I find it beneficial to assert the data as it occurs. For the sake of brevity, this test will gather all the data, and then verify it at the end of the test.
Documentation
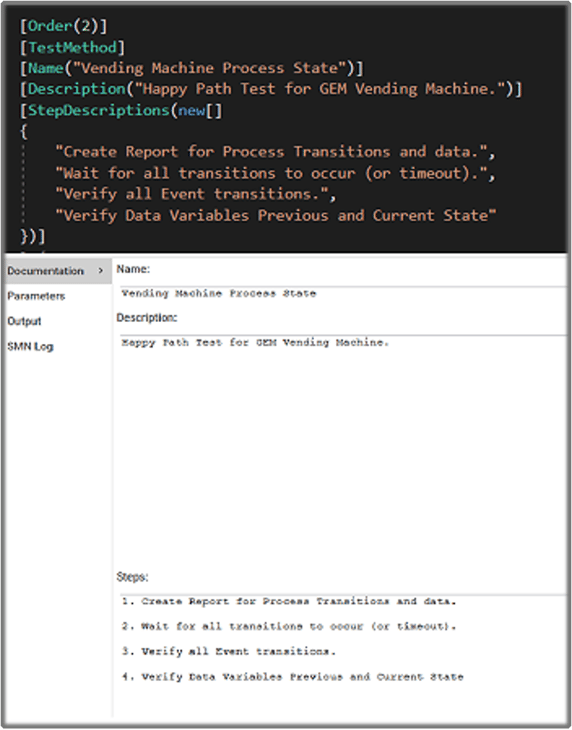
Documentation is one if the items the user will see in the EquipmentTest User Interface. Each Test Step must be documented in the plug-in so the user understands what the test is doing.
 User Parameters
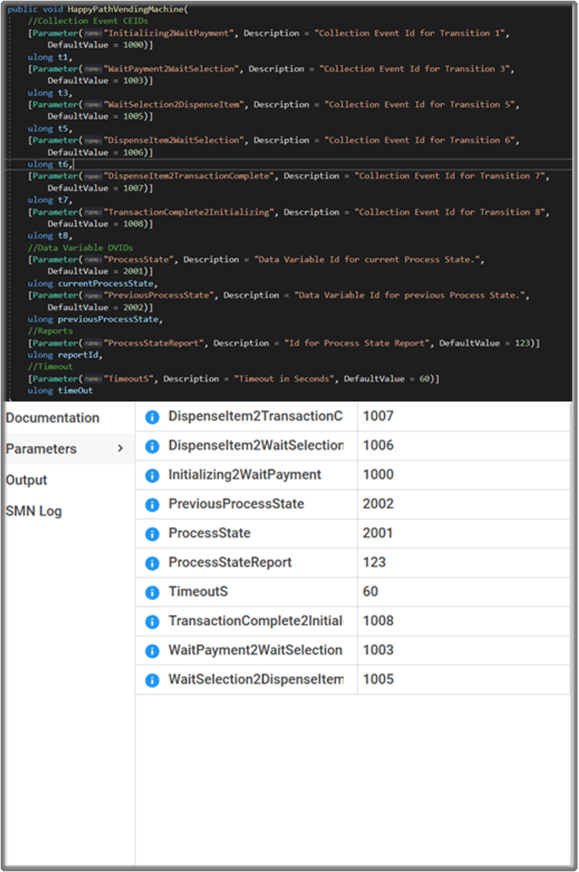
In GEM, each Collection Event, Variable, and Alarm will have an ID. These IDs are needed for host-side testing. Most modern equipment allows us to get these IDs through characterization messaging. For this example, we will allow the user of our test (plug-in) to enter the values manually.
 Custom Test Overview
The HSMS settings are retrieved from the set the user entered in the EquipmentTest user interface.
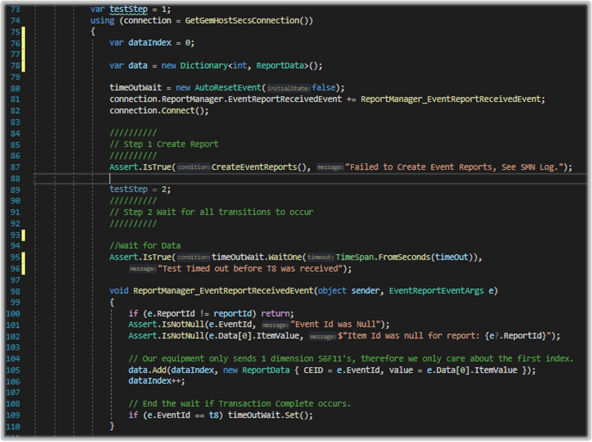
In Step 1, the Event Report for the Processing State Transitions and associated variables are created.
In Step 2, the test waits for an Auto Reset Event “timeOutWait”. If the result times out, the test fails. If the test receives Transition 8, the test continues.
Steps 1-2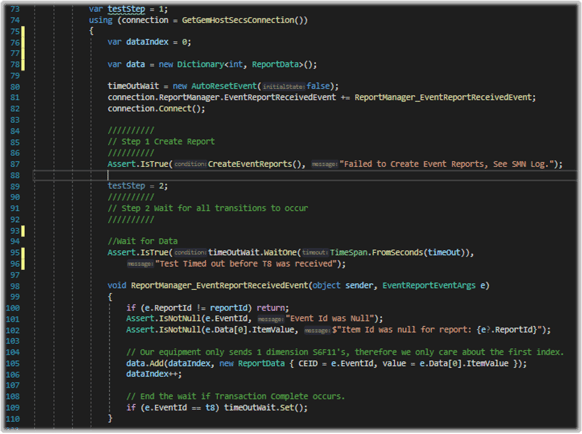
Create Reports
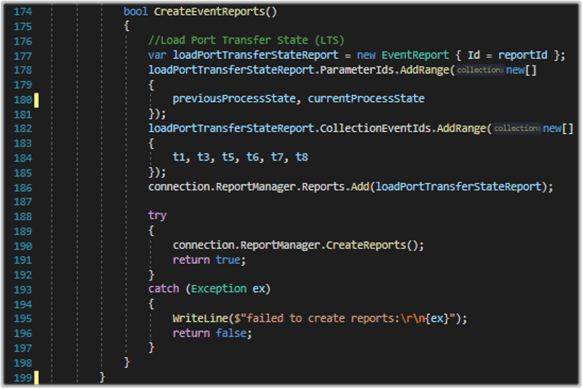
The CreateReports API call sends an S2F33 message to create the report number specified by the user parameter ProcessState Report. The report will contain the status variables ProcessState and PreviousProcessState. Both have a value type of Ascii in this example.
 Test Steps 3-4
Step 3 inspects the data to make sure all the state transitions occurred in the expected order.
The first 4 states should always be T1, T3, T5, and T7 respectively. However, the next states will vary depending on how the user responds. This requires the test to dynamically assert the data.
In test step 4, we extract the variable values, and then use the same approach as step 3 to ensure the previous and current process states were reported correct.
 Conclusion
Though developing this test took a basic understanding of GEM and C#, running the test requires the user to understand neither. This means anyone with access to the equipment and an EquipmentTest run-time license can run successfully run this test.
Cimetrix EquipmentTest allows the developer to harness the extensibility of the .NET Framework. Furthermore, the well-written and proven GEM libraries flatten a significant portion of the learning curve associated with writing GEM tests.
For more information on Cimetrix EquipmentTest, to request a demo, or to speak with an expert, please click the button below.


